


Imagine hitting “Go Live” and stepping into a space that feels as professional, cozy, and immersive as your on-screen persona. Your gaming streaming room isn’t just where you play — it’s your stage, your studio, your creative command center. With the right setup, your room can amplify your performance, improve your production quality, and boost viewer engagement.
In this guide, you’re going to learn how to build a top-tier gaming streaming room — from the hardware, lighting, and decor to soundproofing and layout. Whether you’re just starting out or upgrading an existing space, this article will walk you through practical, actionable steps to turn any corner of your home into a streaming powerhouse.
Why Your Streaming Setup Matters
Before diving into the how-to, let’s understand why building a thoughtful gaming streaming room is so important:
-
Professionalism & Brand Identity: A clean, well-lit, and organized room sends the message that you take your streaming seriously. Your audience perceives professionalism through your visual and audio quality.
-
Performance & Comfort: Good ergonomics, sound control, and lighting help you stream comfortably for longer, reducing fatigue and improving consistency.
-
Technical Stability: A well-planned room ensures you can position gear, manage cables, and get the best network connectivity — minimizing drops, lag, or other disruptions.
The State of Gaming Streaming Today
Live streaming isn’t just a niche anymore — it’s booming. In Q1 2025, gaming streams alone generated 3.74 billion watch hours, making up about 16.3% of the entire live-streaming market.
Twitch continues to lead in gaming, with over 4.6 billion hours watched in Q2 2025 — about 54% of the gaming streaming market.
These numbers show that viewers are still very engaged in live gaming content. With such demand, having a solid streaming room is more than a luxury — it’s an essential investment for serious creators.

Planning Your Gaming Streaming Room: Strategy First
1. Choose Your Space Wisely
-
Size and Shape: Preferably use a quiet room with enough space to move, set up a desk, and place acoustic treatment. Even a small room can work well if planned right.
-
Lighting Conditions: Natural light is nice but can fluctuate, so plan for supplemental lighting. Avoid windows that backlight you unless you can control them.
-
Noise Environment: Identify noise sources (traffic, family, HVAC) and plan for sound isolation or acoustic treatment if needed.
2. Define Your Setup Style
Decide what kind of streamer identity you want:
-
Face-focused streamer: You want a webcam, mic, and background that visually supports you (green screen, decorative setup, or real room).
-
Gameplay-first streamer: Your game is the main focus; webcam may take up less space on screen, so you can emphasize your game capture and sound.
-
Hybrid or content creator: If you plan to mix in talk segments, interviews, or creative media, you might need more lighting zones, a green screen, or a background that’s flexible.
Core Components for Your Gaming Streaming Room
Here’s a breakdown of the essential gear and setups you’ll want to think through in your streaming room.
A. Computing & Streaming Hardware
Your computer (or computers) form the backbone of your gaming streaming room.
-
Single-PC Setup: Most creators start with one powerful streaming/gaming PC. You’ll want:
-
Dual-PC Setup (optional but powerful): Dedicated one PC for gaming + one for encoding/streaming via a capture card. This splits the workload, improving quality and performance. Many advanced streamers prefer this for high FPS and stable streaming.
-
Capture Card: If using a separate PC, choose a quality HDMI capture card (e.g., Elgato, AVerMedia) to send your game feed to the streaming machine.
B. Audio Equipment
Sound matters as much (if not more) than visuals.
-
Microphone: Invest in a good mic. Depending on your budget:
-
USB Mic: Easy to use, good for beginners
-
XLR Mic: Higher quality but requires an audio interface
-
-
Pop Filter / Wind Screen: Reduces plosives. For example:
BOMGE Microphone Foam Pop Filter -
Headphones / Monitoring: Use closed-back headphones or monitors so you can hear the stream output and catch any audio issues.
C. Camera / Webcam
Your webcam or camera helps you connect visually with your audience.
-
For budget to mid-range: Use a high-quality webcam (like Logitech C920/C922 or Brio).
-
For better production: Use a mirrorless/DSLR camera + capture card to feed video into OBS or similar.
D. Lighting Setup
Good lighting dramatically improves your camera quality and visual presence.
-
Use three-point lighting — key light, fill light, and back light — to make you pop.
-
Consider Magnetic Ring Light (4‑level) for a compact, adjustable light behind or beside the webcam.
-
For dynamic or ambient lighting, ORDRO SL‑120 RGB Pocket Light is a small RGB fill light that gives atmospheric color.
-
For general room lighting, something like the HÅRTE LED Work Lamp from IKEA can serve as a practical, flexible light.
E. Background / Green Screen
Your background is part of your visual brand and can greatly affect the feel of your stream.
-
If you want to key out your background, use a green screen:
-
The Elgato Green Screen is extremely popular for its pop-up design and wrinkle resistance.
-
For budget or portable options, the Neewer Chromakey backdrop is well-regarded.
-
-
If you want a decorative background, consider a collapsible screen:
Collapsible Portable Chroma‑Key Green Screen -
For more structured backdrops, the Westcott X‑Drop Pro Backdrop Kit offers frame + cloth.
F. Sound Treatment
Echo and room reflections can kill your audio quality.
-
Use acoustic foam panels on reflection points: side walls, behind mic, ceiling corners.
-
Control low-frequency buildup (room modes) with bass traps in corners for more professional sound.
-
Use rugs, furniture, or wall hangings to help dampen sound naturally.
-
Understand what acoustic foam does: it reduces echo and reverb, but doesn’t fully soundproof.
Layout & Ergonomics
How you arrange your room matters for both comfort and stream quality.
-
Desk Placement
-
Place the desk against a wall or corner to minimize visual distractions.
-
Ensure you have enough space behind you for your background or green screen.
-
-
Cable Management
-
Use cable trays, zip ties, or raceways to hide and organize wires.
-
Hiding cables improves safety and visual neatness. (See home decor tricks for hiding cords.)
-
-
Seating & Ergonomics
-
Use a good gaming or ergonomic chair with adjustable height.
-
Monitor(s) should be at eye level, with keyboard and mouse positioned for comfort.
-
-
Camera & Mic Angles
-
Webcam: Slightly above eye level is typically best.
-
Microphone: Position slightly off-axis from your mouth to reduce plosives, and about 20–30 cm away from reflection surfaces.
-
Software and Configuration
Even with a great physical setup, software tuning makes a massive difference.
-
Use a streaming program like OBS Studio or Streamlabs OBS.
-
Create multiple scenes: gameplay, BRB, intermission, just-chatting, etc.
-
Set your bitrate, resolution, and encoder (hardware vs software) based on your PC specs and internet upload speed.
-
For green screen: use chroma key effect in your software and fine-tune color tolerance, spill suppression, and smoothing.
-
Audio: use filters (noise gate, compressor, limiter) to clean up mic sound and balance levels.
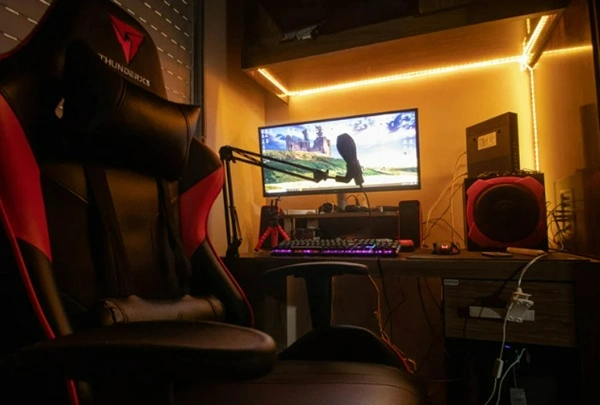
Case Study: Building a Compact Streaming Room on a Budget
Scenario: A streamer in a small apartment (room ~3 × 3 m) wants to set up a gaming streaming room.
-
Space usage: They chose a corner with one wall behind and one side wall. The desk goes into the corner, saving floor space.
-
Backdrop: A pop-up green screen (like Neewer) is mounted on the wall when streaming, but stored when not needed.
-
Lighting: A ring light on the desk, a fill RGB pocket light on the side, and an IKEA LED lamp behind them provide layered lighting.
-
Audio treatment: Acoustic foam panels are placed on the wall behind the mic and the side wall. Soft furnishings like a rug and thick curtains also help.
-
Cable organization: Zip ties under the desk and a raceway up the wall keep power cables tidy.
-
Performance: They use a single mid-range PC, but tweak OBS settings to use NVENC hardware encoding, getting stable 1080p streaming without lag.
-
Aesthetic: Small gaming figurines and LED strips give personality without cluttering.
Transform your living space with Smart Wings Home

Smartwings innovative design meets effortless style from chic furniture to smart home essentials; every piece is crafted to elevate comfort and functionality. Make your house feel like a dream home with products that combine quality, elegance, and practicality. Explore smartwingshome.com today and give your home the upgrade it deserves.
Sample Gaming Streaming Room Build (Mid-Range / High-Performance)

1. PC Build (Single-PC Streaming & Gaming Setup)
This configuration handles fast-paced gaming and clean 1080p–1440p streaming.
| Component | Model | Why It Works | Approx. Price |
|---|---|---|---|
| CPU | AMD Ryzen 7 5800X3D | Amazing gaming performance; great multi-tasking for OBS + gameplay | $280–$330 |
| GPU | NVIDIA RTX 4070 Super | NVENC encoder for smooth streaming; excellent 1440p FPS | $550–$650 |
| RAM | 32GB DDR4 3600 MHz | Ideal for gaming, OBS, multiple apps, browser tabs | $80–$120 |
| Storage | 1TB NVMe SSD + optional 2TB SSD | Fast boot times + space for games & VODs | $80 + $120 |
| Motherboard | B550 ATX Board | Stable, affordable, good upgrade options | $100–$150 |
| PSU | 650W–750W 80+ Gold | Reliable and quiet | $90–$130 |
| Case | Airflow ATX Case (e.g., Lian Li Lancool 215) | Keeps temps low for long streams | $80–$100 |
Why it’s ideal: Strong gaming performance, reliable NVENC hardware encoding, and enough memory for multitasking while streaming.
2. Streaming Gear & Peripherals
Microphone Setup
-
Mic: Elgato Wave 3 / Audio-Technica AT2020 (USB)
-
Boom Arm: InnoGear Adjustable Arm
-
Pop Filter: Standard foam or dual-layer mesh
Why: Clear voice quality and minimal background noise.
Camera Setup
-
Camera: Logitech Brio / Sony ZV-1 with capture card
-
Capture Card (if using DSLR): Elgato Cam Link 4K
Why: Crisp, clean face cam with great low-light performance.
Lighting Setup
-
Key Light: Elgato Key Light Air or Neewer 660 LED Panel
-
Fill Light: Small RGB light or softbox
-
Back Light / Accent Light: LED strip behind desk
Why: Three-point lighting makes your face and background look professional.
Audio Monitoring
-
Headphones: Audio-Technica M40x / HyperX Cloud II
-
Optional Interface (if using XLR mic): Focusrite Scarlett Solo
3. Desk & Room Setup
Desk
-
Size: 55–63 inch desk with cable cutouts
-
Model Example: IKEA Bekant or Autonomous SmartDesk
Why: Plenty of room for dual monitors, mic, keyboard, and lighting.
Chair
-
Model: Secretlab Titan Evo or an ergonomic office chair
-
Why: Long-stream comfort + lumbar support.
Monitor Setup
-
Primary Monitor: 27″ 1440p 144Hz (for gaming)
-
Secondary Monitor: 24″–27″ 1080p (for OBS, chat, alerts)
4. Acoustic Treatment
-
Wall Panels: 8–12 foam acoustic tiles for reflection points
-
Rug: Thick floor rug to absorb sound
-
Curtains: Blackout or thick fabric curtains
Why: Reduces echo and makes your mic sound studio-clean.
5. Background Options
Choose one depending on your aesthetic:
A. Green Screen Setup (Minimalist Look)
-
Elgato Pop-Up Green Screen
Best for: Clean overlays, gameplay-focused streams.
B. Decorated Background (Style + Personality)
Include:
-
LED strips & RGB accents
-
Floating shelves with collectibles
-
Posters or framed wall art
-
Diffused lamp or RGB backlight
Best for: Creating a signature on-camera vibe.
6. Software Setup
-
Streaming Software: OBS Studio
-
Audio Plugins: Noise Gate, Compressor, Limiter
-
Chat Overlays: StreamElements or Streamlabs
-
Video Settings:
-
1080p 60fps
-
Bitrate: 6000–8000 kbps
-
Encoder: NVENC (new)
-
Estimated Total Cost (2025 Prices)
| Category | Estimated Cost |
|---|---|
| PC Build | $1,200–$1,500 |
| Peripherals (mic, webcam, lights) | $400–$700 |
| Desk + Chair + Accessories | $300–$700 |
| Acoustic Treatment + Background | $80–$200 |
| Total Approx. Build Cost | $1,980–$3,100 |
Why This Sample Build Works
This setup strikes a balance between:
-
streaming quality
-
gaming performance
-
budget efficiency
-
upgrade flexibility
It’s strong enough for:
-
1080p or 1440p streaming
-
fast-paced games
-
multi-scene OBS setups
-
light video editing
-
expanding into dual-PC streaming later
It’s also modular, so beginners can start with essentials and upgrade over time.
Common Mistakes & Pitfalls to Avoid
| Mistake | Why It’s a Problem | How to Avoid It |
|---|---|---|
| Ignoring acoustics | Poor room echo ruins audio quality | Treat reflection points, corners, and use rugs/furniture |
| Over- or under-lighting | Too bright causes glare; too dim reduces cam quality | Use layered lighting; test on camera |
| Poor cable management | Safety risk and messy visuals | Use trays, zip ties, and raceways |
| Too high bitrate given the upload speed | Stream lag or dropped frames | Test internet speed; set bitrate accordingly |
| Not planning for background separation | Green screen bleed or cluttered look | Adjust green screen distance, lighting, and chroma key settings |
Frequently Asked Questions (FAQs)
Q: Do I need a green screen for streaming?
A: Not necessarily. Many streamers use their room as a background for personality or branding. A green screen helps if you want to remove your background or layer yourself over gameplay. Some streamers prefer a real room setup because it feels more personal.
Q: How much sound treatment do I really need?
A: It depends on your room and your budget. At a minimum, treat first reflection points (walls facing the mic) to reduce echo. For better sound, add bass traps and diffusers. Even simple treatments like foam panels and rugs make a big difference.
Q: Can I stream with a laptop instead of a desktop?
A: Yes, if it’s powerful enough. But make sure it can run your game and encode the stream. For higher performance, a desktop or a two-PC setup is more reliable.
Q: What internet speed do I need to stream?
A: For 1080p at 60 fps, aim for at least 6–8 Mbps upload. Test your upload speed and consider lowering the bitrate or resolution if it’s not consistent.
Putting It All Together: A Step-by-Step Setup Guide
-
Define your goals: Decide what kind of streamer you are and what aesthetic you want.
-
Measure your room: Note dimensions, windows, and outlets.
-
Order gear: Prioritize mic, lighting, and background.
-
Set up desk & PC: Build or place your PC, connect monitor(s), webcam, mic.
-
Install acoustic treatment: Put foam panels, rugs, and other soft materials.
-
Mount lighting: Install your ring light, RGB fill, and work lamp.
-
Install background: Set up a green screen or decorative backdrop.
-
Cable management: Organize wires and hide them carefully.
-
Configure software: Install OBS, set up scenes, and tune your settings.
-
Test & iterate: Do test streams (private) to fine-tune your audio, lighting, and bitrate.
-
Decorate for personality: Add figurines, LED strips, posters, or props.
Conclusion
Building a high-quality gaming streaming room is one of the most powerful steps you can take to level up your stream. By combining thoughtful planning, the right gear, and smart room design, you amplify your production value, improve comfort, and express your personality. Whether you’re just starting or scaling up, each improvement — from lighting to sound to layout — makes a meaningful difference.
Start small if needed: pick one upgrade (like a better mic or light), test, and build from there. Over time, your streaming room will evolve into a space that’s not just functional, but also inspiring, professional, and uniquely yours. With these steps, you’re well on your way to creating a gaming streaming room that empowers you to perform at your best and grow your audience.